Pinterest

Follow Me on Pinterest

Thursday, June 28, 2012

A Few Classroom Updates

Okay, I made it a full month before heading to my classroom to work! Woo hoo!
The custodians have been working so hard. The amount of work they do to get our school ready is amazing! These women are phenomenal! I could actually see my arm going up & down while I was painting...I MEAN AS A REFLECTION ON THE FRESHLY WAXED FLOOR!!! It looks great! Thanks ladies!
The first thing I wanted to do in my classroom is repaint the storage cabinets. They are a bright red. I like red, just not in large volumes. So I went to the local hardware store & combed through the lovely rainbow. I settled on a BRIGHT yellow. Once I started painting the cabinets I almost backed out on the yellow color. I didn't want to go around the doors & paint the top of the cabinet---this would mean moving all my stored holiday items off the top & I was not up for that today lol. Anyway....here is the result. Let me know what you think! It definitely needs a few more coats & then I need to put the handles back on. You will see in the picture that one of the handles had a screw that would not budge. So I just painted around it.


I wasn't sure if I am allowed to paint my desk or not but while entertaining many ideas...I came up with this idea. You may remember from a previous post, I LOVE ZEBRA PRINT! SOOOOO I had a couple sheer zebra print curtains lying around that I hadn't found a destination for yet...I lifted the glass plate (which is really handy btw) & positioned the curtain under it & waaaa laaaah! Instant desk personalization! I like it! :) Much better than brown. Oh yes & you see that zebra tube hanging down??? I needed camouflage for my smartboard cords. I taped two paper towel rolls together & covered them w/ paper that I stenciled & laminated. I can duct tape it to anything- I had it on the front of my desk before. IDK if I will do that again or not. Next project??? Modge podge that filing cabinet woo hoo! I need to get to Hobby Lobby for some cute scrapbook paper.

Tuesday, June 26, 2012

Luna Document Camera Giveaway

http://oneextradegree.blogspot.com/2012/06/ooo-la-la-luna-another-giveaway.html

Read this awesome blog & follow the steps below to receive an entry to win a document camera.
Here is her description, very helpful! "First of all, the Luna is reasonably priced at $199.99. (It's not nearly as expensive as the Elmo... and that leaves a lot more money in the bank... and in my closet! Ha!)  It is compact, but mighty, and it plugs right in to your computer, so you can use it with your SMARTboard or existing projectors.  It is absolutely wonderful for taking a closer look at a mentor text, modeling a math lesson, and pretty much any kind of demonstration you can think of.  I honestly think the sky is the limit.  I have not tried it yet, but you can actually create a video narration! How great would that be for pod-casting?!  You could add a little podcast to your classroom website to help support your kiddos at home, and they could watch your lesson a second time."

Tuesday, June 19, 2012

Feelie Pie

I recently attended a workshop at Region 16, Phonological Awareness. It was taught by the always fabulous, Kelly Thompson. She has brilliant ideas! Anyway, "Feelie Pie"---you make a pie & can put anything inside it you want. I think the first thing I will use it for is as we are introducing letters of the alphabet. So for A I will put objects inside the pie that begin with the letter A & so on. Kelly suggested letting students be responsible for objects one week at a time. That would be fun but I don't want to put anyone on the spot so I may use a variation of this idea. Here is my pie:


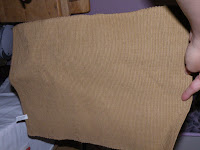
First I found brown place mats at Dollar Tree.
Then I used my hot glue gun & glued one to fit into a pie pan. I would not recommend the cheapy ones- they won't last with kindergarteners! Don't worry if your edges wrinkle- I think it makes it look more realistic. :) 
Then I cut a piece of cardboard to fit the top. (Sorry for the bad picture) The cardboard is a circle. I did cut it a little bit wider than the circle I traced from the pie pan. I wanted it to have a lip for the fabric to glue to the opposite side. This will make more sense as you are doing it. I promise! : )


Then I glued plastic Walmart sacks to the top of the round piece of cardboard. I did this to give it a more rounded pie top & to keep the top from caving in. Again, this will make more sense later! DO NOT GLUE YOUR FABRIC ON TOP OF YOUR PLASTIC BAGS YET!

Next I used these cute little cherry buttons I found at Hobby Lobby. they were not quite as red as I wanted them. The bottom left cherry is how they originally looked- very dull. I repainted them with a bright red acrylic paint & then topped them with red glitter. 


Okay, NEXT I sewed my little buttons on the underside of the fabric. (Of course placing them on the top) You'll just have to play w/ this to get them lined up the way you want. THIS IS WHY I SAID DON'T GLUE YET!

THEN I glued the fabric on top of the plastic sacks making sure my little bump was pretty much in the center. 
Finally, glue the top of the pie to the bottom of the pie BUT leave a gap large enough for an adult hand to fit into. Odds are, you will be the one placing "FEELIE" objects into the pie, at least in the beginning. Here is my opening:
TAAAA DAAAAAAAAAAA!!