Pinterest

Follow Me on Pinterest
Showing posts with label craft. Show all posts

Saturday, July 28, 2012

My "Create" Board

I found this idea on Clutter-Free Classroom's blog here http://clutterfreeclassroom.blogspot.com/2012/07/my-create-board-to-showcase-student.html.
Mine is a little different. I only used red, orange, yellow, green, blue, indigo, & violet. I used six boxes of crayons. 50 cents at Target & Walmart! :) The canvas was about $10 at Michaels. Walmart has two packs for $11...so if you want to make two or had a need for another canvas that would be your better buy.

First line up your crayons to get them where you want them. MAKE SURE YOU ARE LOOKING AT THEM FROM THE TOP OR THEY WON'T BE STRAIGHT! I LEARNED THIS THE HARD WAY. Fortunately they peeled off fairly easy so I could reposition them. Then using hot glue- glue them on one at a time. Then use a hair dryer on low heat. High heat blows toohard & makes the melting crayon splatter. It melts VERY QUICKLY so pay attention lol. :)
This top picture was right after melting- looks neat!
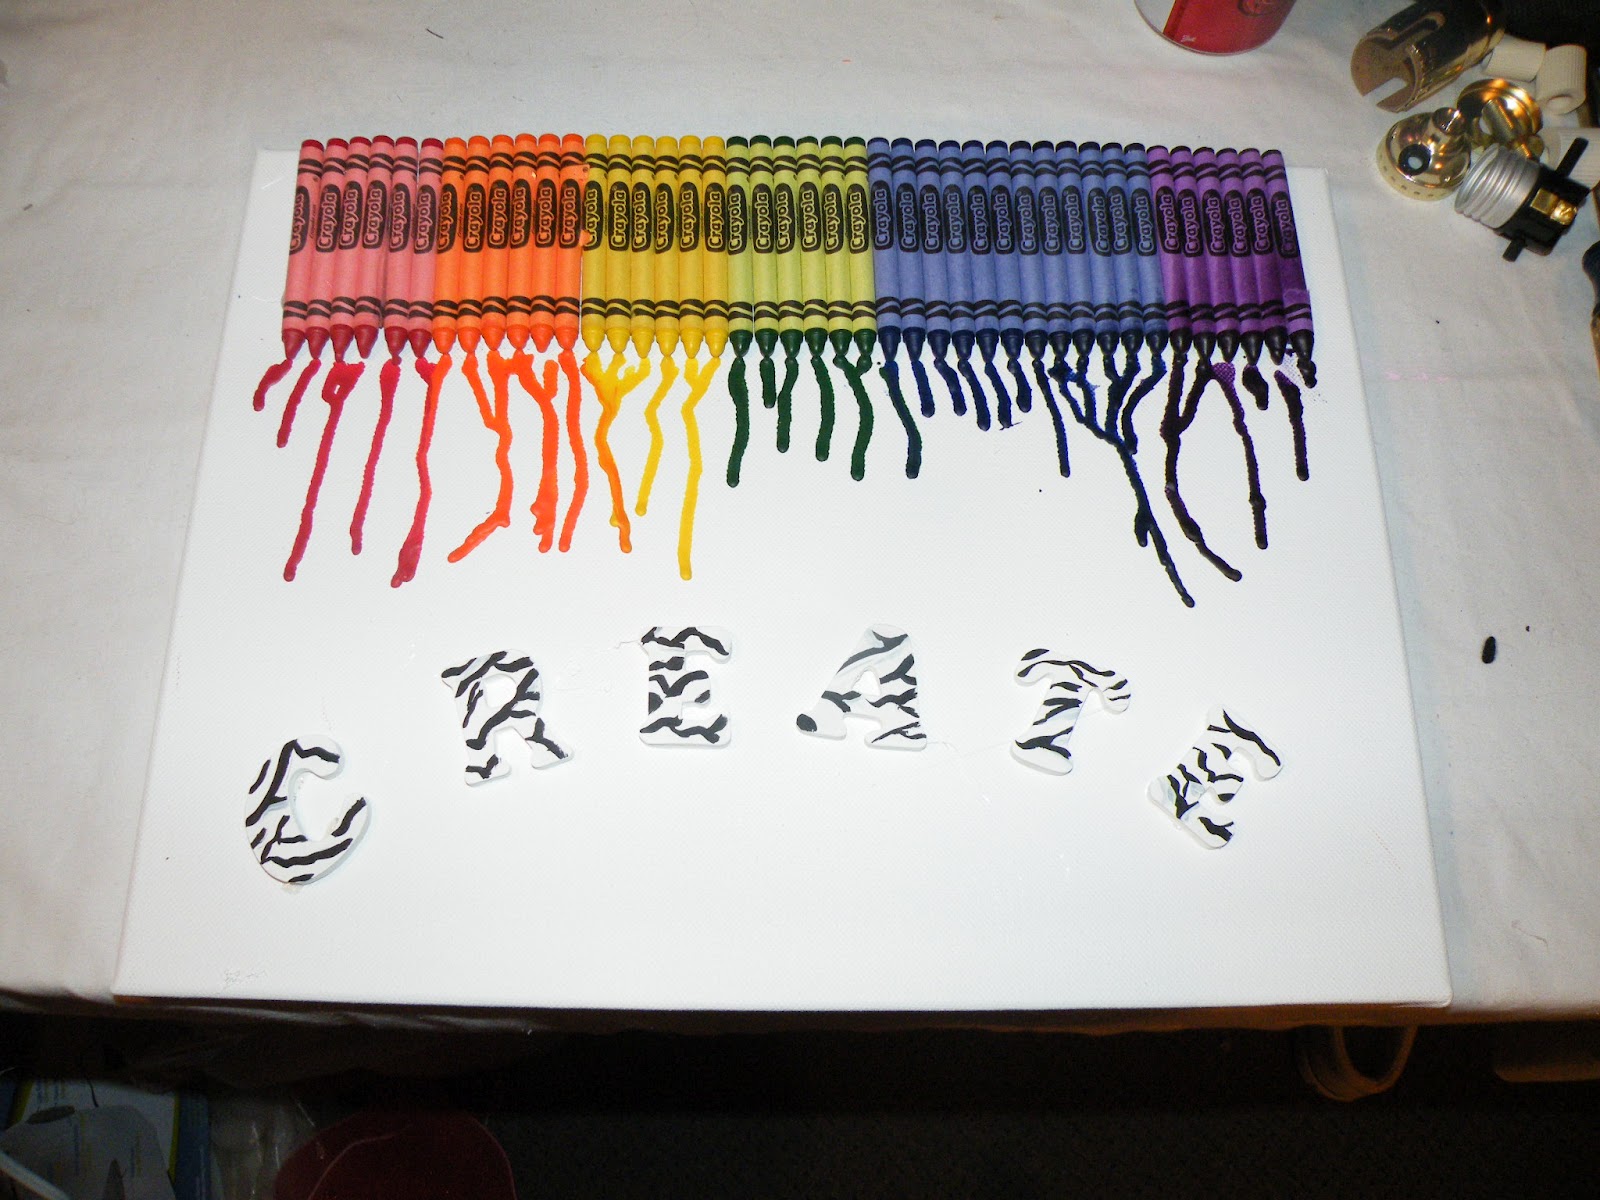
I used wooden letters painted white & then zebra striped (of course) to spell Create. I want this to inspire my kiddos. I am debating leaving it as is or trimming with ribbon...What do you think? This was a fun project that didn't take much time. I love the colors!

Friday, July 13, 2012

More Zebra Love

I found this cute little stool at a 2nd hand store for $8!!!! Can you believe that??? Hobby Lobby has most of their fabric 30% off right now so $10, some hot glue, and a staple gun later....my awesome hubby helped made this for me!!!!!!!!! I love him!!! I helped a little like held stuff in place so he could do the tough part of wielding the high powered staple gun. How cute is this? It will go perfectly in my classroom. I am really enjoying all these projects & can't wait to see my room completed.

Tuesday, July 10, 2012

CHAIR UPDATE

As soon as I finish making the strings/ties to hold the cushion onto the chair I will post a picture of it completed. It was pretty hard to paint this sweet chair black. It was in my first daughter's room when she was a baby. Anyway, here it is!

Wednesday, July 4, 2012

My Favorite Chair

This is my chair where I sit when we do read alouds. The kids love this chair & beg to sit in it during Daily 5 & math centers. I am planning to paint the chair black & have already recovered the cushions with a leopard print fabric so it will match the bucket stools that go under my guided reading table. Here is the chair now.

Okay now here are the covered cushions---just have to add the strings to tie the back one on to the chair. I pinned them & my sweet hubby sewed them for me. He's awesome! :)

Keep an eye out for an updated picture of my favorite chair! :)

New Chairs For My Guided Reading Table!!!

Okay I have been DYING to make these! Here is the original Pinterest pin where I first saw the idea.  I have been putting it off for other projects though. I finally came up with the plan for how I wanted to do it- I did it a little differently w/ less materials than the pin used.
First, I got four buckets, removed the handles, cleaned & scraped them, & spray painted them black. I would NOT recommend cheap Walmart spray paint for painting buckets. It has already started to chip. I plan to paint over it with acrylic paint.


Then I used this poly foam I found at Hobby Lobby, I think it was less than $4. I used two packages of this for four buckets. One would be enough to simply cover it but I wanted to make sure that the kids can't feel the edges of the bucket through the foam---so I doubled up. I hot glued the two circles to each other so they wouldn't slide once I started putting the fabric on.

I just used a permanent marker to trace around the bottom of the bucket directly onto the foam. Easy enough right? Then just cut out your circle. I cut mine larger than the circle I traced because I wanted the edge to have a little more cushion.

Then I just kind of toyed with how I wanted the fabric to lay.

I found these little rectangles of fabric at Walmart. They are the little bundles you can get for about $7. I love animal prints! I have lots of it in my room. :) No worries, I'm an animal lover too!!! This is what it looked like after I just folded the fabric under to get a quick glance on how it might look.

\Okay & yes I took the easy route & hot glued my fabric instead of sewing or anything else. It worked fine & plus if I decide to change my fabric next year I can just pull it off & reuse the foam. :)


AND TAAAA DAAAAA! NEW CHAIRS THAT WERE EASY & INEXPENSIVE TO MAKE! I CAN'T WAIT TO SEE THEM SITTING PRETTY UNDER MY GUIDED READING TABLE.
No worries, I will do touch up painting now. :)
(((((Plus!!! No more putting their feet on the backs of their chairs!!!!!!!!! Wooo HOOOOO!!!)))))))

Sunday, July 1, 2012

Summertime = Craft Time

This really doesn't have anything to do with kindergarten but I wanted to share this anyway. Garage sales are a crafter & teacher's best friend! I found this sweet little carousel horse at a garage sale for $2. My husband thought I was crazy & couldn't imagine what I wanted it for. My daughter named it "Peanut" & decided it is a girl. I am planning to put a protective sealer on her & mount her on a gold column in my flower bed. I think she's pretty! : )

Tuesday, June 19, 2012

Feelie Pie

I recently attended a workshop at Region 16, Phonological Awareness. It was taught by the always fabulous, Kelly Thompson. She has brilliant ideas! Anyway, "Feelie Pie"---you make a pie & can put anything inside it you want. I think the first thing I will use it for is as we are introducing letters of the alphabet. So for A I will put objects inside the pie that begin with the letter A & so on. Kelly suggested letting students be responsible for objects one week at a time. That would be fun but I don't want to put anyone on the spot so I may use a variation of this idea. Here is my pie:


First I found brown place mats at Dollar Tree.
Then I used my hot glue gun & glued one to fit into a pie pan. I would not recommend the cheapy ones- they won't last with kindergarteners! Don't worry if your edges wrinkle- I think it makes it look more realistic. :) 
Then I cut a piece of cardboard to fit the top. (Sorry for the bad picture) The cardboard is a circle. I did cut it a little bit wider than the circle I traced from the pie pan. I wanted it to have a lip for the fabric to glue to the opposite side. This will make more sense as you are doing it. I promise! : )


Then I glued plastic Walmart sacks to the top of the round piece of cardboard. I did this to give it a more rounded pie top & to keep the top from caving in. Again, this will make more sense later! DO NOT GLUE YOUR FABRIC ON TOP OF YOUR PLASTIC BAGS YET!

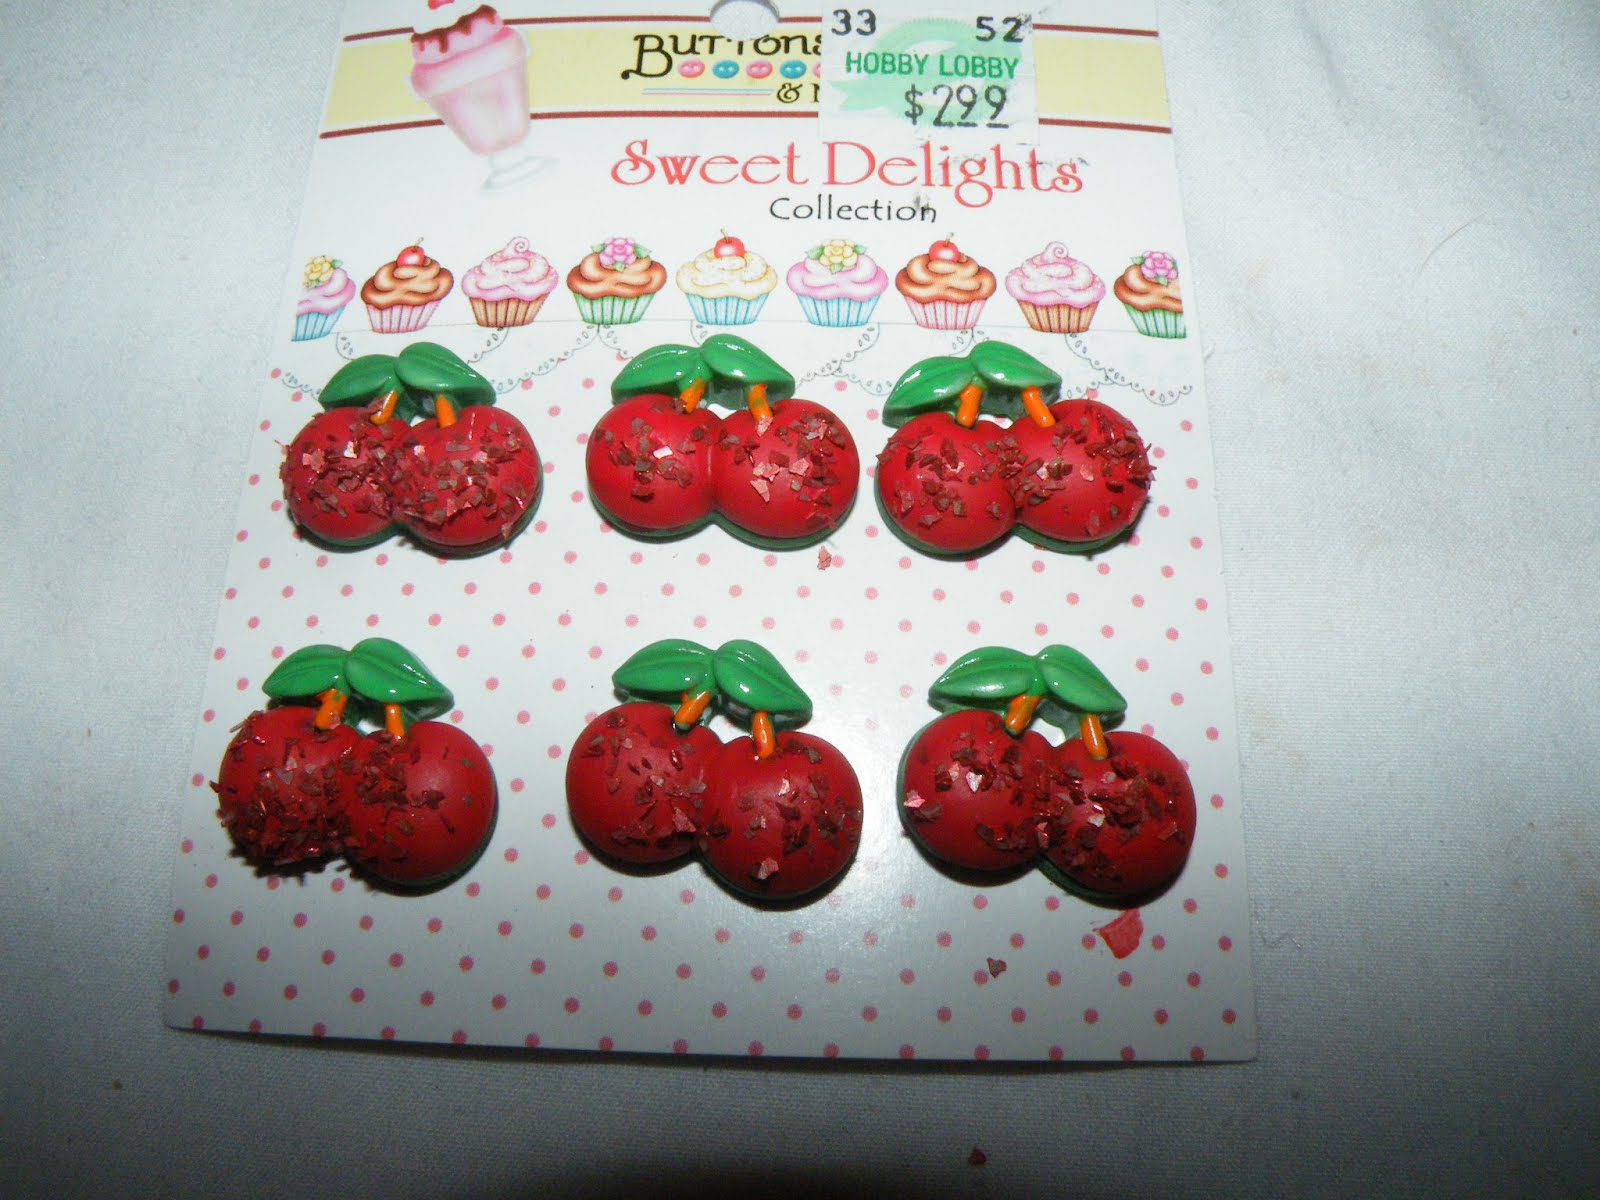
Next I used these cute little cherry buttons I found at Hobby Lobby. they were not quite as red as I wanted them. The bottom left cherry is how they originally looked- very dull. I repainted them with a bright red acrylic paint & then topped them with red glitter. 


Okay, NEXT I sewed my little buttons on the underside of the fabric. (Of course placing them on the top) You'll just have to play w/ this to get them lined up the way you want. THIS IS WHY I SAID DON'T GLUE YET!

THEN I glued the fabric on top of the plastic sacks making sure my little bump was pretty much in the center. 
Finally, glue the top of the pie to the bottom of the pie BUT leave a gap large enough for an adult hand to fit into. Odds are, you will be the one placing "FEELIE" objects into the pie, at least in the beginning. Here is my opening:
TAAAA DAAAAAAAAAAA!!


Tuesday, May 15, 2012

Crazy For Zebra Print!

I LOOOOOOOOOOOVE zebra print. I found this awesome stencil at Hobby Lobby for around $6. I have had this green paint & used it for various shelf painting in my room. This little cabinet was in storage & looked like unfinished wood. Many coats of paint later = green, green, green. Then I decided to use a sharpie & color in the zebra print. I Love it! You can see some of the edges where I had to overlap the stencil design but at least now I know how to avoid that error so the next thing I stencil will look much better! : )